Tuesday, March 20, 2018

Installing Active Directory Part 2 - Dynamics 365 for Finance and Operations On-Premise at Home - 05

In the prior post we created the primary domain controller.  In this article we will configure Active Directory and add a second domain controller.

In a later post we'll set up ADFS and Azure Active Directory (AAD)- both of which are required for Dynamics 365 for Finance and Operations.

Add an OU and Domain Admin Account

25. Open the Active Directory Administrative Center
26. Right-click your domain name > New > Organization Unit


27. Type in "Lab" for the name and accept the defaults for the other fields.
28. Create two organization units (OUs) underneath, one for computers, another for users.
29. Create a user under the Users OU.


30. Fill out first name, last name, user SamAccount, and passwords.


31. Add the user to the "Domain Administrators" group on the "Member Of" group.


32. (Optional) This is a test domain, so you can change the account to not expire the password (not recommended in real environments) and prevent the account from accidental deletion.


Add the second VM to the existing domain

33. Perform steps 10 through 13 on the second VM, then set a static IP with the DNS server referencing the first virtual machine.  This is necessary because Active Directory creates SRV DNS records which need to be referenced to join computers to the domain.


34. Join the second virtual machine to the domain (requires a restart).


35. The installation of the role is the same, however we will configure/promote the AD server differently.  Complete steps 17 and 18 above on the second VM.
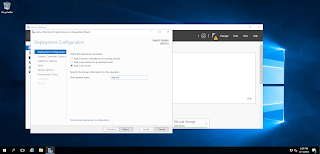
36. In server Manager, click on the pending notifications and then "Promote this server to a domain controller"

37. We will use the "Add a domain controller to an existing domain" option, using the credentials of the user created earlier.


38. Specify the same Directory Services Restore Mode (DSRM) password as used on the other server.


39. Accept the default settings for the rest of the wizard and "Updating DNS delegation" is not necessary.  Click Install.


40.  The server should reboot.  Finally, kick off Windows updates, as per the usual.

Congratulations we now have a two-DC Active Directory domain!


Saturday, March 17, 2018

Installing Active Directory Part 1 - Dynamics 365 for Finance and Operations On-Premise at Home - 04

One of the 'shared service' environment requirements for Dynamics 365 for Finance and Operations is an Active Directory domain.  There should never be just one Active Directory server, so we'll create two Windows Server 2016 virtual machines.  AX needs an Active Directory functional version of at least 2012 R2.  The requirements when using Windows Server 2016 are 1 vCPU and 2GB of RAM (although I allocate 4GB and use dynamic memory).

In a later post we'll set up ADFS and Azure Active Directory (AAD).

Creation of the Hyper-V VM

1. Open Hyper-V Manager
2. Click "New virtual machine"
3. Specify a name, i.e. LabDC01


4. Select "Generation 2" for the generation of the virtual machine
5. Specify 4096 MB of dynamic memory


6. Create a new virtual hard disk.  I specified 80 GB to be save, as the disk will only take the space it requires.  After I completed all the steps here, including Windows Updates, the disks were taking less than 20GB.
7. Attach an iso file of Windows Server 2016 as your option for installation.
8. Click finish


9. Start the VM

Do the same for the second VM.

Setting up the first Domain Controller

10.  Go through the installation of Windows Server 2016.  There are very few questions, however, I did chose to install the Desktop Experience.  For the key, I chose to install without a key to see if the AVMA feature of Hyper-V works.


11. After installation, change computer name, i.e. LabDC01.


12.  Disable the firewall (this is an internal server which can be scrapped if needed).


13. Enable RDP connections


14. Give it a static IP- this is required for setting up these servers to host DNS.  Choose an IP address which will be reserved for this server.  Make sure that you do not give this IP address to another device later.  The DNS setting in the screenshot is the upstream DNS, which in my case is a local pfSense firewall/server.


15. Turn off IE Enhanced Security
16. Restart

Add the Active Directory Domain Services and DNS Server roles

17. In the server manager that automatically opens when the server restarts, click "Manage > Add Roles and Features"


18.  Chose "Role based or feature-based installation" and the current local server, check mark both "Active Directory Domain Services" and "DNS Server."  For each, a popup will ask if you want to add the features required for that service, click "Add features" in both occasions.


Promote this server to a domain controller


19. After installation, click the warning icon and then "Promote this server to a domain controller" wizard.


20. Click "Add a new forest" and give it a good domain name- for this purpose we'll use two words separated by a period.


21. Type in a password for the directory services restore mode.  The rest of the options are the defaults.


22. Accept the default paths and click "Install."
23. The server will automatically reboot.


24. Finally go ahead and kick off Windows Updates, as per the usual.

We have created the primary domain controller and in the next post we'll cover configuration and adding a second domain controller virtual machine.

Wednesday, March 14, 2018

Attaching an iSCI LUN to Windows Server 2016 - Dynamics 365 for Finance and Operations On-Premise at Home - 03

Regardless of the NAS device you may be using, the following steps can attach iSCI storage to your server for VM storage.  These are the steps I took:

Attach an iSCI LUN to Windows Server 2016

1. Log into the Hyper-V server
2. Open the iSCI Initiator program
3. Type in the static IP address of your NAS


4. Click "Quick Connect"


5. Click "Done."  The virtual disk name should appear "Connected."
6. Click the "Volumes and Devices" tab
7. Click "Auto Configure" button.  This should add your volume to the list


8. Start > Run  compmgmt.msc
9. Click on Storage > Disk Management.  The new disk (LUN) should appear offline.
10. Right click and choose "Online"


11. Right click and choose "Initialize Disk"


12. Choose to create a GPT (GUID Partition Table) for the disk.


13. Right click the unallocated area and choose "New Simple Volume..."


14. Format the volume as NTFS, 64K, give it a label, and quick format.


Change Default Hyper-V VM Folders

15. Open Hyper-V Manager
16. Click on your server
17. Click "Hyper-V Settings"
18. Change the "Virtual Hard Disks" setting to a subfolder of your new drive.


19. Change the "Virtual Machines" folder to your new drive.


We are now ready to create virtual machines!!

(Optional) Download AIDA64 or IOmeter and run a disk test.


Reference: How to use iSCSI Targets on a Windows Server

Sunday, March 11, 2018

Setting up iSCSI with Synology - Dynamics 365 for Finance and Operations On-Premise at Home - 02

Previous Post: Windows and Hyper-V Installation - Dynamics 365 for Finance and Operations On-Premise at Home - 01

To support the number of VMs and possible environments I want to host I will be leveraging a network attached storage (NAS) device to store data.  My network backbone is a full gigabit running on CAT6 plenum-rated cable.  The disks and more details will be explained in detail when I do some benchmarking.

iSCSI Setup on Synology NAS

I own a Synology Network Attached Storage (NAS) device which can support recording surveillance, running VMs, private cloud drive, and many more features.  The Synology device is more resilient than the used hard drives in the server I recently bought.  So I created a one terabyte LUN for storing VM configuration and drives.  If the server's hard drives crash, I can either purchase a replacement drive and rebuild the RAID array or reinstall Windows with the drives left.  Either way I will be able to reattach the virtual machine files from the Synology NAS and run them with little pain.  Additionally it is 'thin provisioned' meaning the storage is not taken until it is used by a VM.


Here are the steps I took:

1. Log into the DSM interface
2. Open the Storage Manager 'app'
3. Click iSCSI LUN
4. Click "Create" button
5. Click "Next", thereby accepting a File-Level LUN


6. Change the settings to Advanced LUN, 4KB, and the appropriate capacity.
7. Click Next

7. Set your own IQN
8. Click next
9. Click Apply

You now have a LUN available to your network which we will connect to our Hyper-V server.

Reference: How to use the iSCSI Target service on Synology NAS

Friday, March 9, 2018

Windows and Hyper-V Installation - Dynamics 365 for Finance and Operations On-Premise at Home - 01

Previous Post: Setting up Dynamics 365 for Finance and Operations- on-premise...at home!

Setting up the Server

The server arrived, it is time to get rolling!  I first jumped into the BIOS.  It is easier and better to configure things before the operating system is installed.  First, I set up four SAS 300GB 10k drives in a RAID 5.  RAID 6 has better redundancy yet I do not have the hard drives to support it.  I enabled virtualization technology and execution prevention in the BIOS.  HP servers come with Integrated Lights Out (ILO) so I configured the IP address and admin user.


Installing Windows Server 2016-  I first downloaded Datacenter edition using my MSDN subscription- Automatic Virtual Machine Activation” (AVMA) should automatically activate the virtual machines it hosts.  I created a bootable USB drive using the free Rufus tool.  The installation was straightforward.  Once Windows Server 2016 was installed, I went straight to windows updates, which had to run several times until all of the cumulative updates installed correctly.  Then I renamed the computer and I made note of the MAC address so I could set up a static DHCP entry in my router.

Installing Hyper-V

  1. Open Server Manager
  2. Click Local Server
  3. Click Manage > Add Roles and Features
  4. Next
  5. Role-Based
  6. Select the current server
  7. Check mark "Hyper-V," click ok when it asks to add the management tools
  8. Next
  9. Next
  10. Finish
  11. Reboot

Stay tuned for iSCSI setup then Dynamics 365 for Finance and Operations, Enterprise Edition on-premise installation....

Tuesday, March 6, 2018

Setting up Dynamics 365 for Finance and Operations- on-premise...at home!

In order to build some of the automation tools and test configurations I set down the path of purchasing a server.  There are many servers available with decent specifications, still under warranty, and with good performance.  The better deals are enterprise hardware being replaced (used)- look at Dell PowerEdge and HP ProLiant hardware.  In contrast to a beefy gaming PC, these used enterprise servers are built to run 24x7 until they die, decade(s) later.

The older the hardware, the less efficient it is with power, and therefore the server produces more heat.  Living in a warm client, my office already is warmer by several degrees because of my office setup: two computers, three monitors, and peripherals.  You can reference Intel's Ark web site by putting in the processor number and it will tell you the wattage as well as the year that the processor was introduced.

I chose to go with a tower, HP ProLiant ML350 G6 Server, in the hopes that it will have better airflow and less noise.  It supports two hex-core processors (24 threads) and has 18 DIMM for memory (max 192GB).  The HP servers seem to be cheaper than the Dell, however there are reports of hypervisor issues with HP, so I'm crossing my fingers.  With the tower form factor, I have more flexibility for changing fans to reduce noise.

For Dynamics 365 for Finance and Operations, Enterprise Edition, keep in mind that:
I plan on pushing the minimum requirements, first to explore how performance changes with different configurations and the usage on the server will be minimal.

Join me on this adventure, including setting up the server, environment, LCS, and Dynamics installation.

Thursday, March 1, 2018

Converting Toodledo Tasks to Nozbe

Over the past ten years I have loved the Pocket Informant system of Getting Things Done (GTD) with Toodledo as the back end.  However, I found Nozbe - yes they've been around this whole time!  I wish I had known about them sooner!  So, I took my 150+ tasks from Toodledo and converted them into a format that Nozbe could import.

Check out the Python code to convert your data!

Interested in signing up?